
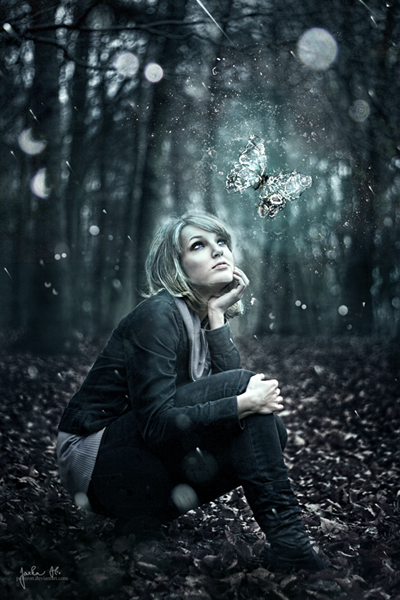
Preview of Final Results
Resources
Step 1 - Cleaning the Background
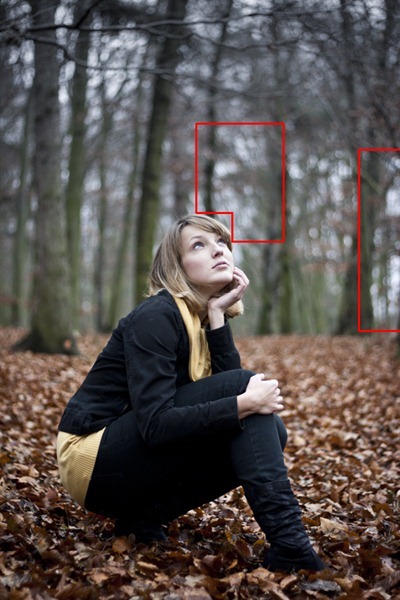
Open the photo of woman in Photoshop. Right now it's bit boring, ordinary photo. It was shot during day but you want to turn it into nigh. You also want to change the light from soft, diffuse light into spotted light coming from the butterfly. You'll learn how to do it in this tutorial.Let's start with cleaning the background. There are few bright spots (see the image below) which are distracting. You'll remove them in this step.
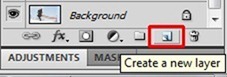
Create a new layer above the BACKGROUND and name it e.g. BACKGROUND RETOUCH.
You can find the button "Create a new layer" in the bottom part of the palette Layers. If you don't see this palette simply press F7 on your keyboard or go to Window > Layers and it will appear.
Grab the Stamp Tool (S) and cover the highlighted area with some darker bokeh. (If you don't know how to use the Stamp Tool you can take a look at this video.)
After this step your background should look like below.
![01_3[4]](http://photoshoptutorials.ws/560f7a332688_12DD5/01_34.jpg "01_3[4]")
Step 2 - Preparing Selection of Girl
In the following step you are adjusting the bottom part of the background - leaves. To be able to adjust only them and not the rest of the image you're creating mask of the girl and forest in this step.You need to create sharp mask of girl, you're using the Lasso Tool (L) for it. For the forest you should create mask with soft transition on the horizon. Using the Brush Tool (B) is ideal for it.
Click on the layer BACKGROUND and grab the Lasso Tool (L). Then make a selection of the girl. You don't need to care about the part of her body which is in front of the forest but you should be very careful with selecting the bottom parts.
I know that masking is quite boring and very uncreative part of doing photo manipulations but it's crucial to create realistic looking picture. So be as patient as possible.
Below you can see how the mask of the bottom part of the body should look.
![02_1[4]](http://photoshoptutorials.ws/560f7a332688_12DD5/02_14.jpg "02_1[4]")
Click on the icon Edit in Quick Mask Mode (Q) which can be found on the Tools palette (or simply press Q on your keyboard). Because of this mode you see mask painted with red.
Grab the Brush Tool (B), select some soft round brush and pick black color. Now paint over the forest. You should get something like this:
![02_2[4]](http://photoshoptutorials.ws/560f7a332688_12DD5/02_24.jpg "02_2[4]")
Press Q on your keyboard to switch back to normal view. You're seeing only borders of the mask again.
To be able to work with the mask later you need to save it. To do that go to Select > Save Selection... and name it e.g. LEAVES.
![02_3[4]](http://photoshoptutorials.ws/560f7a332688_12DD5/02_34.jpg "02_3[4]")
Let the mask activated.
Step 3 - Adjusting Leaves
In this step you're changing color of leaves to give them little bit more magical atmosphere. To do that you'll use two adjustment layers - Selective Color and Hue/Saturation.Using of adjustment layers is much better than using direct adjustments. With adjustment layers all the changes you do are always reversible. If you use direct adjustments you can make only as many changes as your History goes plus you'll loose all the later steps.
You can find the button "Create new fill or adjustment layer" in the bottom part of the palette Layers same as the button "Add new layer" mentioned in earlier steps.
![03_1[4]](http://photoshoptutorials.ws/560f7a332688_12DD5/03_14.jpg "03_1[4]")
Let's begin with Selective Color. Click on the button "Create new fill or adjustment layer" and, surprisingly, choose Selective Color. Set it as on the next image.
![03_2[4]](http://photoshoptutorials.ws/560f7a332688_12DD5/03_24.jpg "03_2[4]")
As you can see because of the activated mask (from previous step) adjustment layer affects only leaves. On the thumbnail of the adjustment layer you can see which parts is adjusted - it's white. Part without adjustment is black.
![03_3[4]](http://photoshoptutorials.ws/560f7a332688_12DD5/03_34.jpg "03_3[4]")
Move on saturation. Before you're adding adjustment layer Hue/Saturation you need to activate the mask again. To do that Ctrl + click on the thumbnail of Selective Color adjustment layer. Mask activates again.
Now add new adjustment layer Hue/Saturation and set it as on the following picture.
![03_4[4]](http://photoshoptutorials.ws/560f7a332688_12DD5/03_44.jpg "03_4[4]")
Because of the activated mask only leaves are adjusted again.
Below you can see how your image should look so far.
![03_5[4]](http://photoshoptutorials.ws/560f7a332688_12DD5/03_54.jpg "03_5[4]")
Step 4 - Desaturating the Forrest
In previous step you added colder tones to the leaves. To create balance you should make also forest in the background colder looking. To do that you're using adjustment layers again, this time Color Balance and Hue/Saturation.If you look closely on the forest you can see some greener moss which is bit distracting. To make it less saturated and less distracting add new adjustment layer Hue/Saturation and set the value Saturation on -100.
![04_1[4]](http://photoshoptutorials.ws/560f7a332688_12DD5/04_14.jpg "04_1[4]")
Click on the thumbnail of the adjustment layer. Grab the Paint Bucket Tool (G) and fill the thumbnail with solid black color. Adjustment disappears.
Grab the Brush Tool, select some soft round brush and lower its Opacity on about 30%. Pick white color and paint over the green parts of the forest. Adjustment appears again in that areas and desaturates moss.
![04_2[4]](http://photoshoptutorials.ws/560f7a332688_12DD5/04_24.jpg "04_2[4]")
Step 5 - Cyan Tones to the Forrest
Now it's time to use Color Balance as I mentioned in previous step. You use it to create colder, more magical atmosphere.Add new adjustment layer Color Balance and set it as shown below.
![05_1[4]](http://photoshoptutorials.ws/560f7a332688_12DD5/05_14.jpg "05_1[4]")
You want to change colors of forest, not the whole image. You need to change layer mask of the adjustment layers. Same as in previous step grab the Paint Bucket Tool (G) and fill the layer mask with solid black color. Then grab the Brush Tool (B) and paint with white over the forest to make the Color Balance adjustment visible again.
![05_2[4]](http://photoshoptutorials.ws/560f7a332688_12DD5/05_24.jpg "05_2[4]")
On the picture above you can see where I painted with white. As you probably notices I also painted over the woman's hair to give them similar tone as the background.
Your picture should look similar to the one shown below so far.
![05_3[4]](http://photoshoptutorials.ws/560f7a332688_12DD5/05_34.jpg "05_3[4]")
Step 6 - Adding Mist
If you've read more of my tutorials you probably know that I really like using mist to create magical or fantasy atmosphere in my images. And this image is no exception so in this step you're adding mist to the horizon.Download the mist brushes listed in the beginning of the tutorial (or any other mist brushes you're comfortable to use) and install them into Photoshop. (If you don't know how to install them you can take a look at this tutorial.)
Create a new layer on the top of all layers and name it MIST. Grab the Brush Tool (B) and select one of the brushes you've just installed. Hold Alt to activate the Eyedropper Tool (I) and select some of the very light colors from the background.
It's better to avoid using pure white and black color in your work because they're very rare in nature. Most often you can see some light shades of blue, yellow or green instead of white and dark shades of e.g. brown instead of white. These shades don't look so harsh and are more realistic.
Enough talking just paint the mist :) Below you can see where I painted it to get the inspiration. Mist is behind the girl so avoid painting over her.
![06_1[4]](http://photoshoptutorials.ws/560f7a332688_12DD5/06_14.jpg "06_1[4]")