

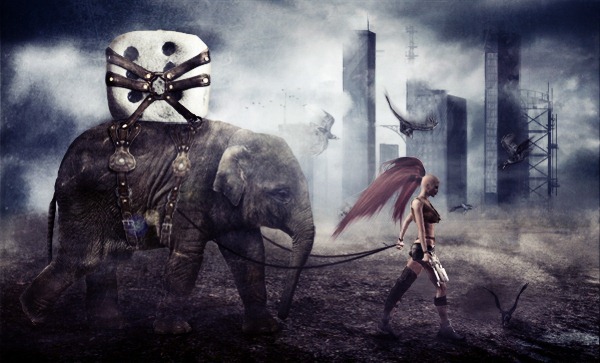
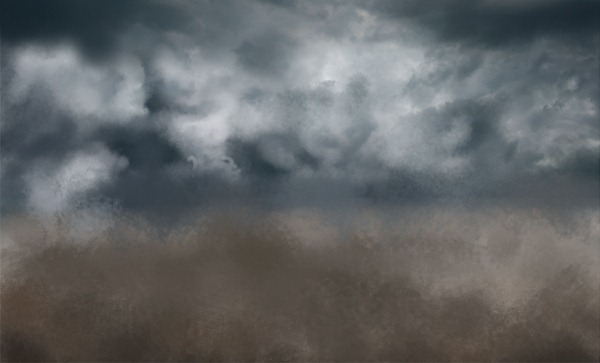
Preview of Final Results
Resource
To complete the tutorial you can use my own resources which are exactly the same as in the preview manipulation but in lower resolution, or find similar stock over the internet. The link for the low resolution images is here.
Step 1 - Preparing the Background
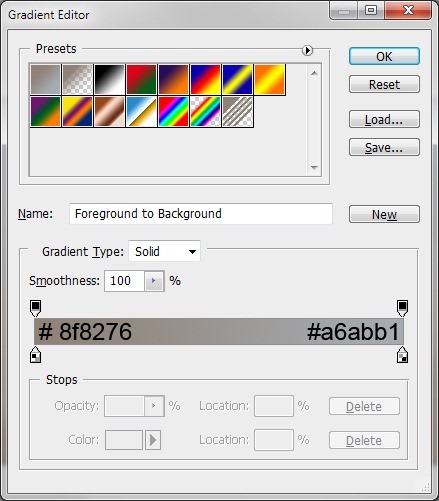
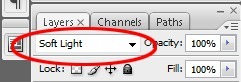
Create a new document in Photoshop. The size depends on the resources you want to use. If you use the resources provided above, use 900 px x 540 px. Otherwise any size that fits your stock images will work. Select the Gradient Tool (G), then select Linear Gradient (see picture below).

Select the Gradient Tool (G), then select Linear Gradient (see picture below).
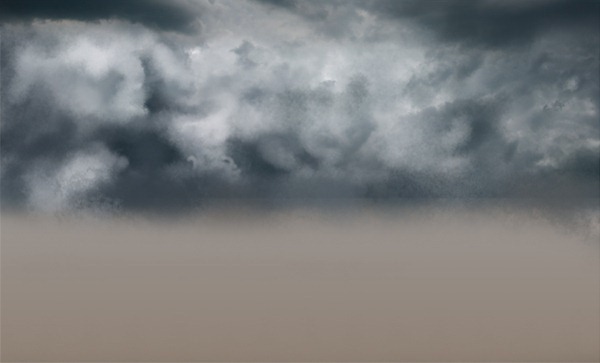
Fill the background layer with this gradient. You should get something like this:

Step 2 - Adding the Sky
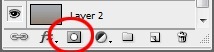
Open the picture of sky and drag it into your manipulation. Name the layer SKY and place it above the BACKGROUND. Add a vector mask to this layer. The Add Vector mask button can be found on the bottom part of your palette layers (if you don’t see this palette just press F7).
Side Note: Using a vector mask instead of erasing parts of the image is much better because you can always change what you’ve done. When you erase parts with the Eraser Tool (E) they are erased for good, but with the vector mask you just hide the unwanted parts of the image and make them appear again whenever you want.
Add a vector mask to the SKY, by selecting the Brush Tool (B) in black and start to paint over the areas which will make them disappear. You can change the diameter of the brush and opacity to get a more natural result. Do this until the sky is nicely blended. If you want to reverse some steps, choose a white color and paint over the areas you want to re-appear.
Step 3 - Adding the Ground
Create the ground of the picture. Add new layer on the top of your layers and name it GROUND TEXTURE. Download these brushes and add them to Photoshop. If you don’t know how to install brushes you can refer to this tutorial.
Select the Brush Tool (B) and select one of the brushes you installed. Pick a dark brown color (a bit darker then the gradient brown) and paint some texture on the GROUND TEXTURE layer. See below for an example:
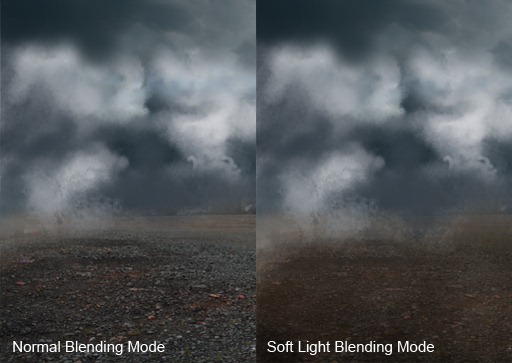
Download the picture of the ground (if you use resources from my blog use Ground 1) and drag it into the manipulation. Name the layer GROUND 1 and place it on the top of your layers. Change the Blending Mode of the layer to Soft Light.
For this image you could use the Normal Blending Mode but the Soft Light creates a nice painted look. You can see a comparison below:
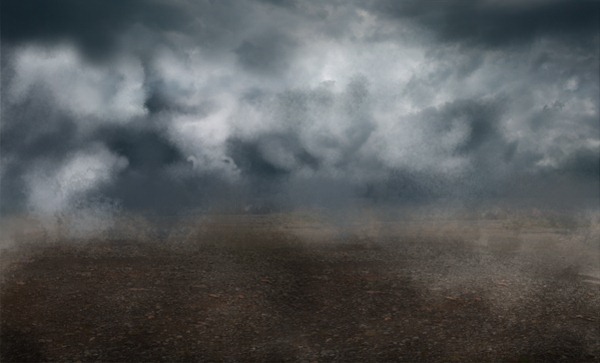
Add a vector mask to GROUND 1 and blend the image. After this step your picture should be similar to the one below.
Step 4 - Adding Details to the Foreground
The ground in the foreground looks a bit flat and uninteresting. It would look better with more details. To do this, download Ground 2 from the blog mentioned previously (or use your own resources) and drag it into the manipulation. Name the layer FOREGROUND DETAILS and put it on the top of your layers. Change the Blending Mode to Soft Light again and add a vector mask. Select the Brush Tool (B) and select a soft round brush. Pick a black color and blend this layer.