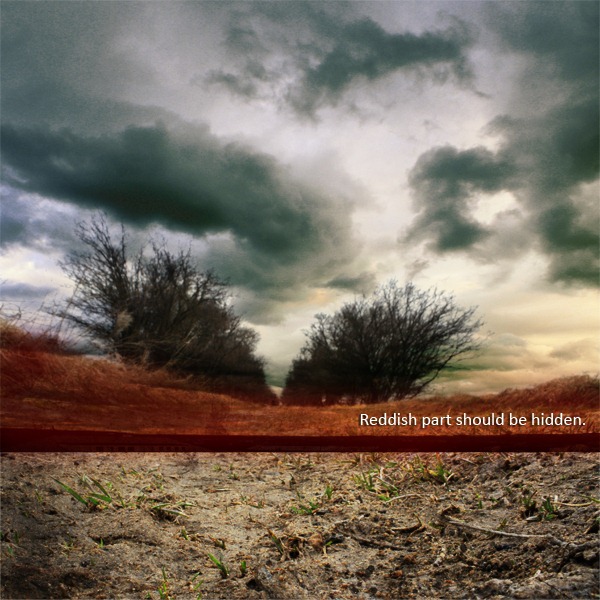
Preview of Final Results
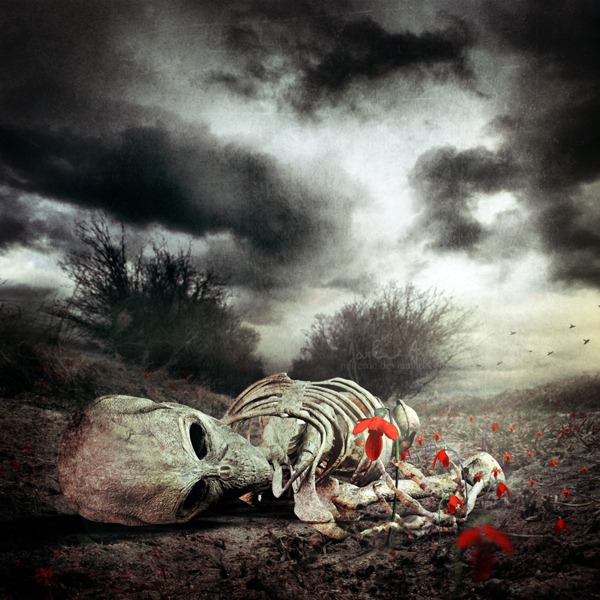
Step 1 - Removing Sky From Background
Download the picture of the ground and open it in Photoshop. First of all we need to remove the current sky which is boring and really uninteresting so we can replace it with more dramatic one in next steps. Cutting the sky out with Lasso Tool or Pen Tool would be really time consuming and hard. To avoid that we use Channels.Click on the Channels palette. If you don´t see it go to Window > Channels and it will appear. On the palette you can see separated red, green and blue channel.
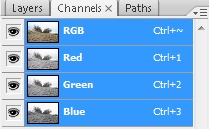
Duplicate the one where is the highest contrast between the sky and the ground. I duplicated Blue Channel. Press Ctrl + L. It activates Levels color adjustment. Set Input Levels similar as it is shown on the picture bellow.
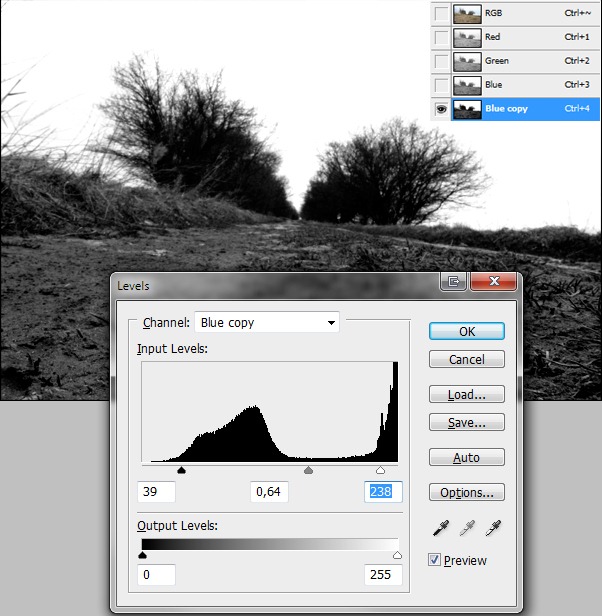
Grab the Brush Tool (B), pick black color and paint over the rest of the ground which is not black but only grey. You should end up with something similar to this one:
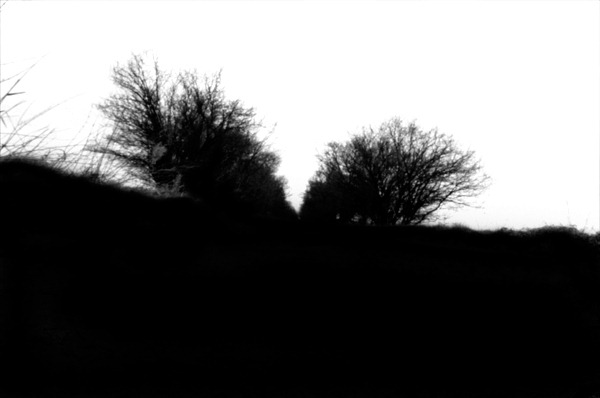
Click back on RGB Channel to be able to see the picture in colors again.
On your Layers palette right click on the background layer and choose the option Layer From Background. Name the layer GROUND.
Now go to Select > Load Selection and set the Channel on Blue copy. Press OK. This step activates selection based on the Blue copy Channel which you’ve created a while ago.
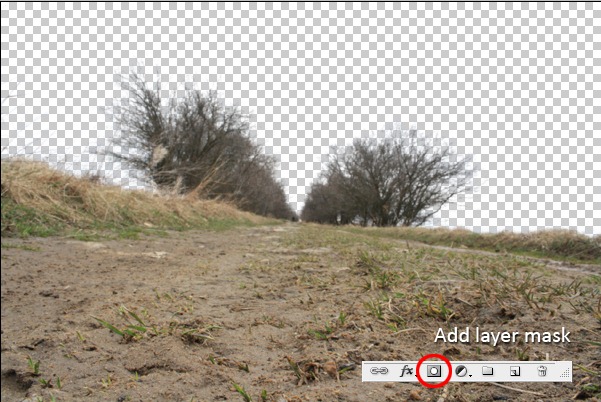
Press Ctrl + Shift + I to invert the selection and add Layer Mask. The button Add layer mask can be seen on the bottom part of the Layers palette.
This cause that the sky disappear.
Step 2 - Deflection of Ground
In this step you will deflect the ground so it will have better shape for putting the skeleton. Go to Image > Rotate Canvas > 90° CVV and then to Filter > Distort > Shear and set the curve as you can see bellow.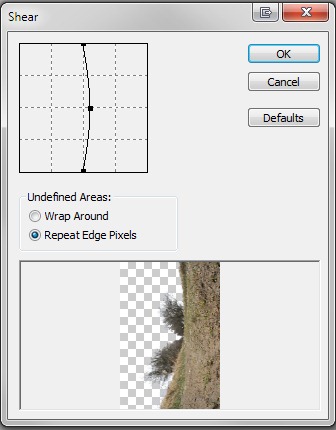
Choose the option Repeat Edge Pixels instead of Wrap Around and press OK. No go to Image > Rotate Canvas > 90° CV to give it back the right orientation.
Step 3 - Square Format
As you can see the final picture has square format. We will fix it in this step. Grab the Crop Tool (C) and set Width and Height on the value 1.Bellow it’s seen how the cropping looks.
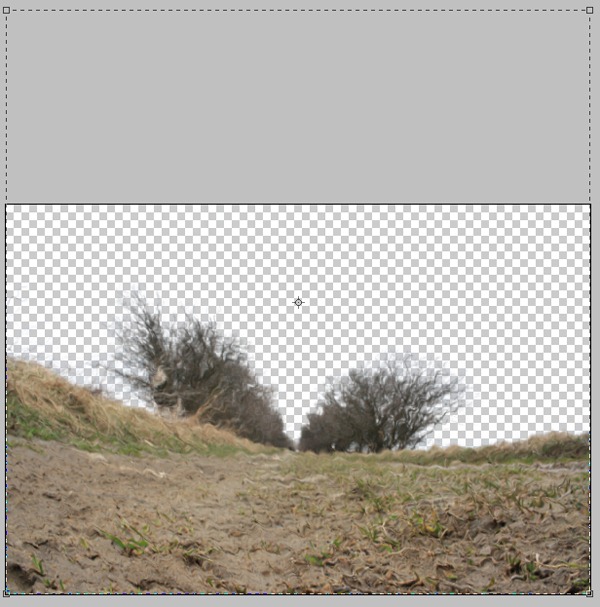
Press Enter to crop it.
Step 4 - Adjusting the Ground
In this step you will increase the contrast of the ground and add details with using of texture.First of all it’s necessary to fix contrast. To do that add Adjustment Layer Levels. Using of adjustment layer is really useful because all adjustments you do this way are non destructive and you always can go back and change them. It’s almost impossible to do that if you adjust your pictures with using of Image > Adjustment > ... Thanks to adjustment layers you can also adjust only parts of the image.
The button Create new fill or adjustment layer is in the bottom part of your Layers palette.
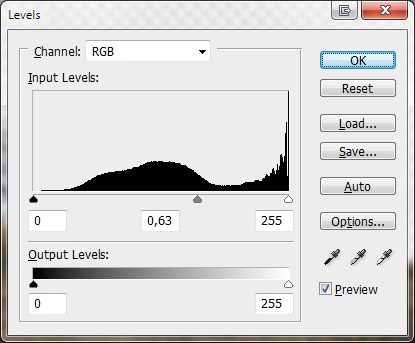
Set the Input Levels on 0; 0,63; 255 and press OK.
Now download the grunge texture and drag it into the manipulation. Place this layer on the top of your layers and change the Blending Mode on Overlay.

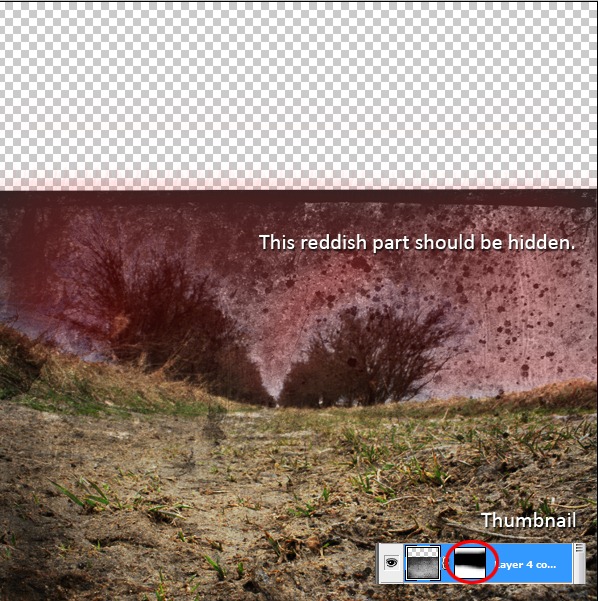
Now add layer mask. Make sure that the layer mask is active (just click on the thumbnail of the layer mask), grab Brush Tool (B), choose some soft round brush, pick black color and paint over the areas of the texture which should be hidden.
Step 5 - Adding the Sky
Download the picture of sky and drag it into your picture. Name the layer SKY and place it on the top of your layers. Press Ctrl + T and resize it on proper size. Set the Blending Mode on Multiply. Add layer mask and with using of black brush erase the parts of the sky which should be invisible.