
In this tutorial you’ll learn how to compose magical scene from
different stock images, how to create strong atmosphere and add
interesting lights and shadows. You’ll also learn many different ways of
color adjustments to get the exact images you’ve always wished. Let’s
get started!

Place the layer UPPER BACKGROUND to the upper part of the image.
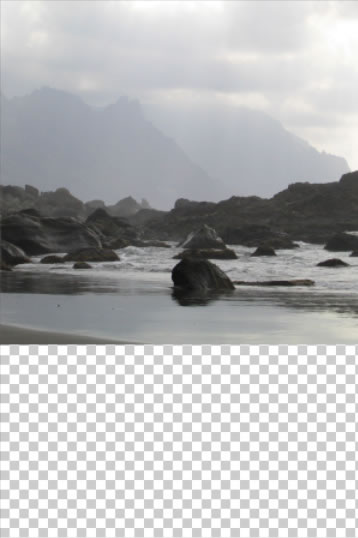
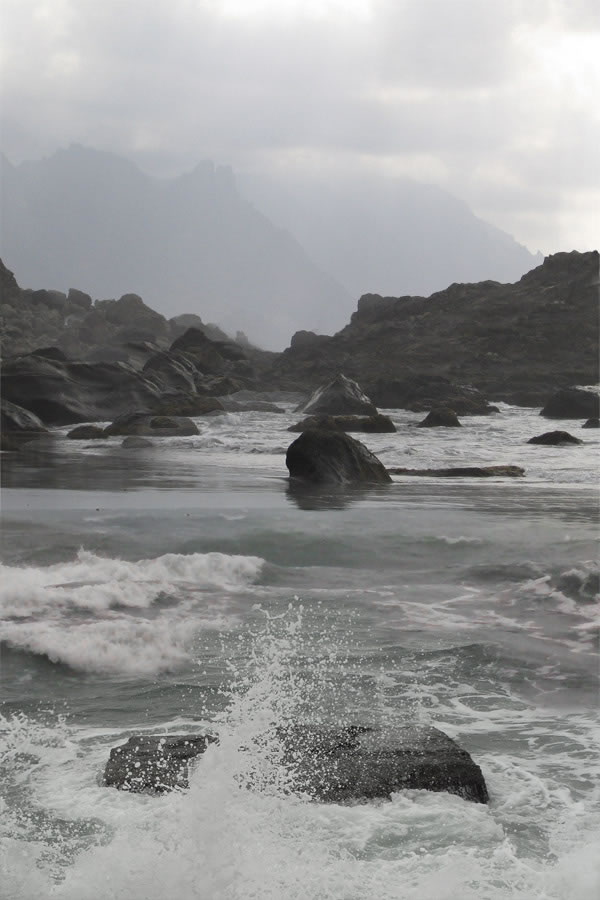
I like the overall serene atmosphere of the stock photo. It has an enigmatic, foggy mood which I find to be especially attractive. But I also like drama in my images. To bring some drama here you’ll create higher mountains on the left and right side.
Grab the Lasso Tool (L) and select the right part of the rocks. Press Command/Ctrl + C to copy this selection and then Command/Ctrl + V to paste it. Name the new layer RIGHT ROCKS and place it above the original rocks. Below you can see an example of what I mean.
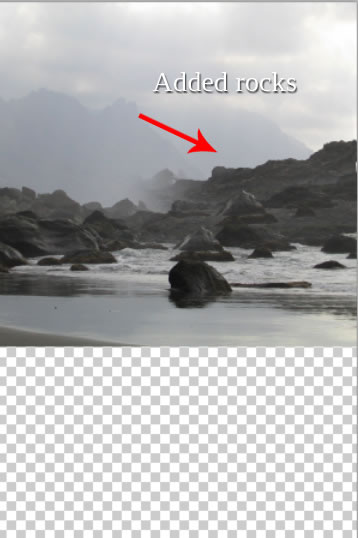
As you can see it looks very unrealistic right now. To make it better looking you need to blend it with the rest of the image.
You could do it with the Eraser Tool (E) but I have a better idea for you – using layer mask. When using the Eraser Tool (E) the erased parts are lost for good and it’s very hard to reappear them if you realize you want to do something differently. If you work with layer masks the parts are just hidden (not erased) and you can easily make them reappear.
The principle is simple: if you want to hide something, paint on the layer mask with black over that part, if you want to have something visible, paint over it with white.
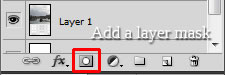
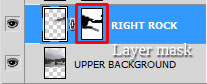
Make sure you’re on the RIGHT ROCKS layer. Click on the button Add layer mask. You can find this button in the bottom part of the palette Layers. If you don’t see this palette press F7 on your keyboard or go to Window > Layers and it appears.
Grab the Brush Tool (B), select some soft round brush and set the Master Diameter on about 70 px. Lower the Opacity on 40% and pick black color. Make sure that the layer mask is active (just click on it) and start blending RIGHT ROCKS with the background.
Now do the exact same process with the left part of the rocks. On the picture below you can see how your manipulation should look like after this step.
You need to blend the SEA with the rest of the image. You’ll do it same as you’ve blended rocks in the previous step. Add a layer mask and paint with the Brush Tool (B) over the transition between see and rocks. Use the same brush settings as in the previous step. Paint till you create nice soft transition. On the photo below you can see how the blending should look.
Another element, which needs to be added, is the stone in the foreground on which the woman sits in the preview picture. Download the stone photo listed in the beginning of the tutorial. Drag it into your manipulation, place it on the top of all layers, resize it and name it STONE.
As with previous parts of the background you need to blend the stone with the rest of the picture properly. To do this, add a layer mask to the STONE. Grab the Brush Tool (B), pick some soft round brush, set the Master Diameter on about 150 pixels, lower the Opacity on 50% and pick black color. Paint over the areas of the STONE you want to hide. On the picture below you can get the inspiration how the layer looks with the layer mask.
And there is shown how the overall manipulation looks so far.
Download the stock photo of the sky listed in the beginning of the tutorial and drag it into your photo manipulation. Place it on the top of the layers and name it SKY. Press Command/Ctrl + T or got to Edit > Free Transform and resize it on proper size. Press Enter to apply the changes.
You need to do two things to blend this layer properly with the rest of the image – to change its Blending Mode and to blend it with the help of layer mask.
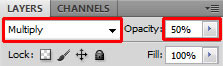
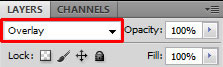
Let’s start with the changing of the Blending Mode. You can find it in the upper part of the palette layers. Change it from the mode Normal to Multiply and then lower the Opacity on 50% to get more gentle effect.
Add the layer mask to the SKY and blend it the same way you did it in previous steps.
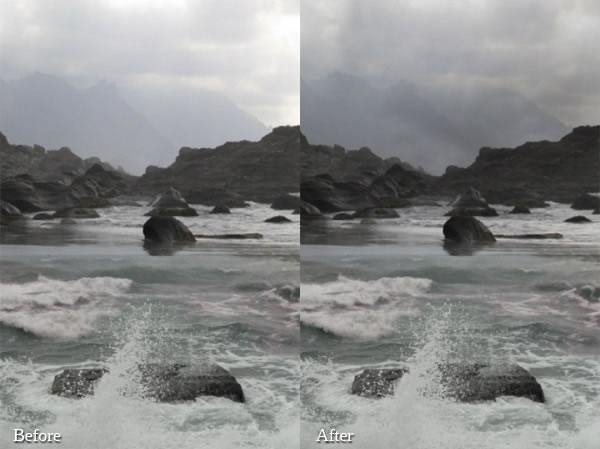
On the following photo you can compare how the sky looks before and after this step.
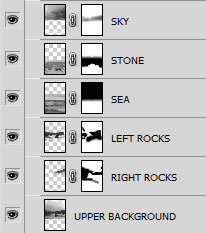
Let’s take a look at how the layer order should look like:
On the photo below you can see how the photo manipulation should look like so far.

Download the stock photo of the face and open it in Photoshop. Cut out the background. You can you the Lasso Tool (L) or the Pen Tool (P) or any other method you are comfortable with to do it. After that drag the face into your photo manipulation. Name it RIGHT FACE and place it on the top of all layers. Press Command/Ctrl + T on your keyboard and resize it on proper size.
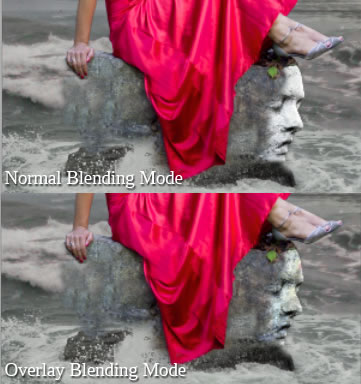
To blend the face better with the rest of the image change its Blending Mode from Normal to Overlay.
On the following picture you can compare how the face looks when it’s set on Normal and on Overlay Mode.
You want to have the face also on the left part of the stone. Right click on the layer RIGHT FACE and choose the option Duplicate layer. Name the new layer LEFT FACE. You need to flip it so go to Edit > Transform > Flip Horizontal. Grab the Move Tool (V) and place it on the left side of the image.

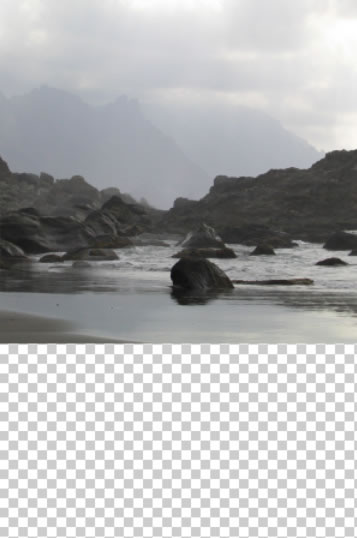
Step 1 – Preparing the Upper Part of the Background
Create a new file in Photoshop. Set the dimensions on 600px (wide) and 900px (height). Download the picture of the background and drag it into the just created file. Name this new layer e.g. UPPER BACKGROUND. To set the proper size of this layer press Command/Ctrl + T on your keyboard (or go to Edit > Free Transform) and resize it on proper size. Hold Shift while doing it to remain the same proportions. To apply changes press Enter on your keyboard.Place the layer UPPER BACKGROUND to the upper part of the image.
I like the overall serene atmosphere of the stock photo. It has an enigmatic, foggy mood which I find to be especially attractive. But I also like drama in my images. To bring some drama here you’ll create higher mountains on the left and right side.
Grab the Lasso Tool (L) and select the right part of the rocks. Press Command/Ctrl + C to copy this selection and then Command/Ctrl + V to paste it. Name the new layer RIGHT ROCKS and place it above the original rocks. Below you can see an example of what I mean.
As you can see it looks very unrealistic right now. To make it better looking you need to blend it with the rest of the image.
You could do it with the Eraser Tool (E) but I have a better idea for you – using layer mask. When using the Eraser Tool (E) the erased parts are lost for good and it’s very hard to reappear them if you realize you want to do something differently. If you work with layer masks the parts are just hidden (not erased) and you can easily make them reappear.
The principle is simple: if you want to hide something, paint on the layer mask with black over that part, if you want to have something visible, paint over it with white.
Make sure you’re on the RIGHT ROCKS layer. Click on the button Add layer mask. You can find this button in the bottom part of the palette Layers. If you don’t see this palette press F7 on your keyboard or go to Window > Layers and it appears.
Grab the Brush Tool (B), select some soft round brush and set the Master Diameter on about 70 px. Lower the Opacity on 40% and pick black color. Make sure that the layer mask is active (just click on it) and start blending RIGHT ROCKS with the background.
Now do the exact same process with the left part of the rocks. On the picture below you can see how your manipulation should look like after this step.
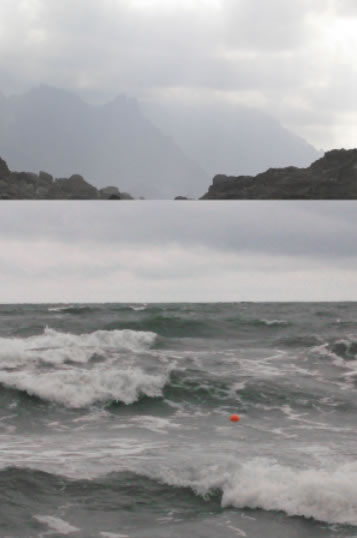
Step 2 – The Bottom Part of the Background
Download the stock photo of sea listed in the beginning of the tutorial and drag it into your manipulation. Name this new layer SEA. Press Command/Ctrl + T and change its size to fit the rest of the manipulation. Press enter to apply the changes.You need to blend the SEA with the rest of the image. You’ll do it same as you’ve blended rocks in the previous step. Add a layer mask and paint with the Brush Tool (B) over the transition between see and rocks. Use the same brush settings as in the previous step. Paint till you create nice soft transition. On the photo below you can see how the blending should look.
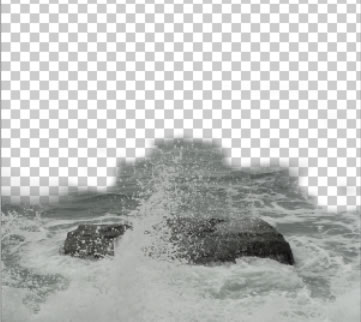
Another element, which needs to be added, is the stone in the foreground on which the woman sits in the preview picture. Download the stone photo listed in the beginning of the tutorial. Drag it into your manipulation, place it on the top of all layers, resize it and name it STONE.
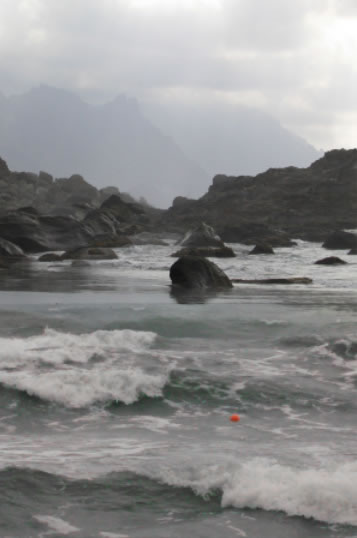
As with previous parts of the background you need to blend the stone with the rest of the picture properly. To do this, add a layer mask to the STONE. Grab the Brush Tool (B), pick some soft round brush, set the Master Diameter on about 150 pixels, lower the Opacity on 50% and pick black color. Paint over the areas of the STONE you want to hide. On the picture below you can get the inspiration how the layer looks with the layer mask.
And there is shown how the overall manipulation looks so far.
Step 3 – Darkening the Sky
In this step you’ll focus on adjusting the sky. Right now it’s too bright, which doesn’t fit to the mood you want to achieve with this work. In this step you’ll darker it little bit and then you’ll make some more adjustments in following steps.Download the stock photo of the sky listed in the beginning of the tutorial and drag it into your photo manipulation. Place it on the top of the layers and name it SKY. Press Command/Ctrl + T or got to Edit > Free Transform and resize it on proper size. Press Enter to apply the changes.
You need to do two things to blend this layer properly with the rest of the image – to change its Blending Mode and to blend it with the help of layer mask.
Let’s start with the changing of the Blending Mode. You can find it in the upper part of the palette layers. Change it from the mode Normal to Multiply and then lower the Opacity on 50% to get more gentle effect.
Add the layer mask to the SKY and blend it the same way you did it in previous steps.
On the following photo you can compare how the sky looks before and after this step.
Let’s take a look at how the layer order should look like:
Step 4 – Adding the Woman
This is very quick step. Download the stock photo of the woman and drag it into your photo manipulation. Place it on the top of all layers and name it WOMAN. Press Command/Ctrl + T on your keyboard and resize it on proper size. After you’re done press Enter on your keyboard to apply the changes.On the photo below you can see how the photo manipulation should look like so far.
Step 5 – Adding Faces
As you can see the side parts of the stone, on which the woman sits, looks really weird because of the very soft edges. But don’t worry in this step you’ll add stone faces on each side to fix it.Download the stock photo of the face and open it in Photoshop. Cut out the background. You can you the Lasso Tool (L) or the Pen Tool (P) or any other method you are comfortable with to do it. After that drag the face into your photo manipulation. Name it RIGHT FACE and place it on the top of all layers. Press Command/Ctrl + T on your keyboard and resize it on proper size.
To blend the face better with the rest of the image change its Blending Mode from Normal to Overlay.
On the following picture you can compare how the face looks when it’s set on Normal and on Overlay Mode.
You want to have the face also on the left part of the stone. Right click on the layer RIGHT FACE and choose the option Duplicate layer. Name the new layer LEFT FACE. You need to flip it so go to Edit > Transform > Flip Horizontal. Grab the Move Tool (V) and place it on the left side of the image.